Welcome to Part 3 of our comprehensive guide on setting up a Python development environment on Windows. In this installment we will show how to create a Python virtual environment, install third party packages with pip. In addition we will show how to make the project in to a package in order to avoid errors related to Python imports.
In the previous sections, we covered: Setting up a Python Dev Environment on Windows, if you haven't followed this section and are running in to Python path errors, or pip not found errors, I suggest you read the previous post.
📋 Contents
Intro: Folders 📁 & VS Code
When setting up a Python development environment—whether you're a total beginner, an expert, or somewhere in between—it's always a good idea to make accessing and creating new folders as easy as possible. It's easy to procrastinate if there are even the smallest obstacles in the way!
Plus, once you have a lot of folders locally, it becomes easy to lose track of them. Side note: If this already sounds like you, you might want to check out this guide on setting up GitHub Desktop.
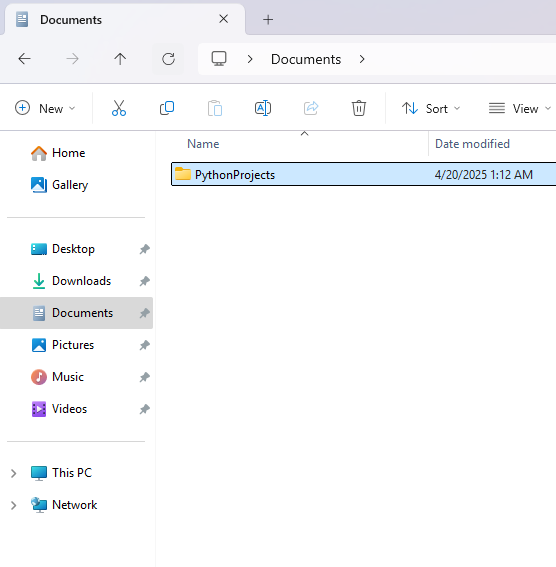
When setting up a new machine, I usually create a folder 📁 -> Document/PythonProjects to store down all my projects.
Create new Python Project folder & Open in Vs Code
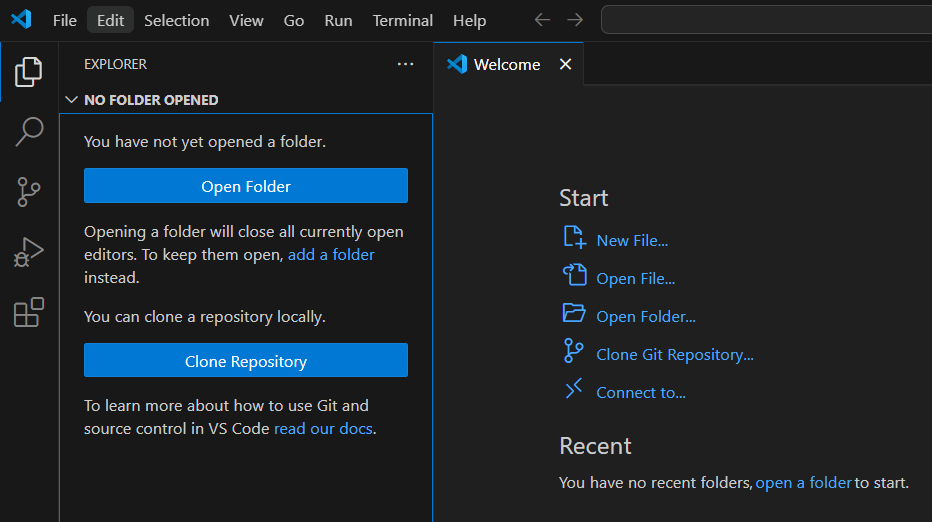
Ok so if you already find yourself at this screen in Vs Code, ❌ Vs Code entirely, and go back to your folder from previous section.
In my Documents/PythonProjects folder, I create a new folder called FirstProject. Its usually easy to create your new project folder outside of Vs Code, and then just open it with ➡️ a right click ➡️ Show more options ➡️ Open with Code

Create A Virtual Environment
What is a Python Virutal Environment?
In Python, a virtual environment is a setup that allows you to keep all your project-specific packages and dependencies separate from the system-wide ones. It’s quite useful when you’ve multiple projects, each needing different versions of the same libraries. Without a virtual environment, things can get messy quickly!
Command to Create Python Virtual Env in Vs Code
Then type command below ⬇️ to create it. Note that sometimes you will see it called .venv , so you could also do python -m venv .venv, or call it something else (but that's not recommended).
# Create a virtual environment Powershell
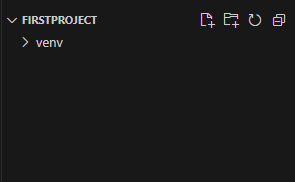
python -m venv venv
![]()
You should see up in the file section there has been a folder called venv created ⬇️
Activate Venv from Terminal
Type the command below to activate your virtual environment ⬇️
# Activate on Windows PowerShell
venv\Scripts\activate

Once a Python virtual environment has been activated you should see (venv) to the right of your terminal as shown above.
Common Error
OK so you try to activate your venv and then you see the following in Vs Code ⬇️
\venv\Scripts\Activate.ps1 cannot be loaded because
running scripts is disabled on this system. For more information, see about_Execution_Policies at
https:/go.microsoft.com/fwlink/?LinkID=135170.
At line:1 char:1
+ venv\Scripts\activate
+ ~~~~~~~~~~~~~~~~~~~~~
    + CategoryInfo          : SecurityError: (:) [], PSSecurityException
    + FullyQualifiedErrorId : UnauthorizedAccess
This means that Windows is blocking your script, the easiest way to fix this is just to type ⬇️
##Change your user policy to allow local scripts to activate venv
Set-ExecutionPolicy -Scope CurrentUser -ExecutionPolicy RemoteSigned
The command above allows local scripts but still protects against those downloaded from the internet!
Now simply type in again ⬇️
# Activate venv after SecurityError/ PSSecurityException
venv\Scripts\activate
🧩 Installing Python Extensions in VS Code
If you create a hello_world.py file as shown in the image below, you will notice there is no "Run" button in the top right of your screen where you might expect it. This is because the correct Python extension has not been installed.

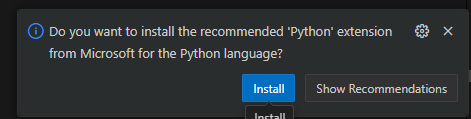
If you see a popup in the bottom-left of your screen like the one below, click Install.
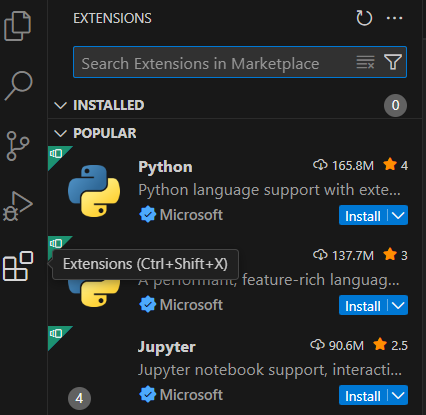
Otherwise, click on the Extensions button on the sidebar, then search for and install the Python and Pylance extensions as shown below.
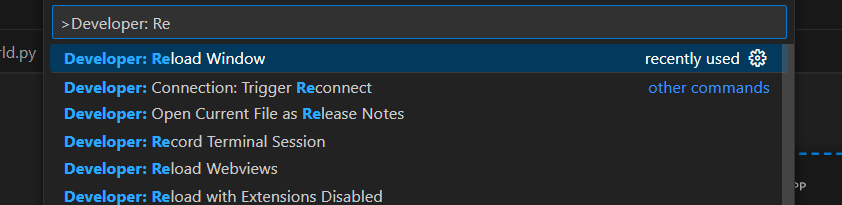
After installing these extensions, you may need to reload the window. To do this:
- Press Ctrl + Shift + P
- Type Developer: Reload Window
- Hit Enter
This reloads the window and clears any initial errors the extensions may have thrown.
📦 Install Python Packages with Pip
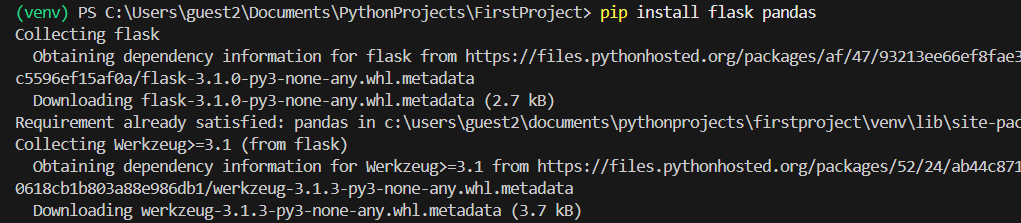
Back in your terminal, installing packages with pip is very easy. Simply type: pip install package_name. I’m going to install my two favorite packages: Flask and Pandas.
# Install packages
pip install flask pandas
📄 The Professional Way: Pip Install with requirements.txt
It’s usually a good idea to create a file called requirements.txt, where you keep a list of the Python packages you’ve installed. Later on, you can pin the exact versions, which makes it easier to install things on a new machine or to work collaboratively within a team.
As shown below, we create a requirements.txt file and add the packages we want installed to it:
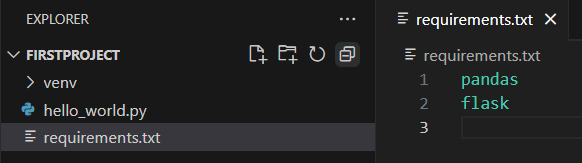
Then to install them all at once, we simply type ⬇️
# Install many python packages at once with install -r
pip install -r requirements.txt

'ModuleNotFoundError: No module' named Error Solved for Vs Code
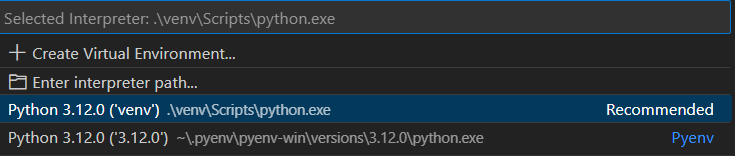
This is quite an annoying error, it basically means either you haven't installed the package, or if you have Vs Code is using the wrong Python Interpreter (i.e. the venv you created). The easiest way to fix this is to press Ctrl Shift p and then type ⬇️
# VS code settings option to select python interpreter
Python: Select Interpreter

Sometimes for whatever reason, Vs Code gets confused about which interpreter to use when running your Python scripts. Notice from the Window below that the .\venv\ path means our current project directory, which is naturally the recommended one. If yours says something other than the current folder's venv then you probably have done something wrong and need to follow the steps above again.
Hopefully now you are ready to begin your first Python Project without the setup stress!
📚 Further Reading
- 🔗 Run Python Scripts in the Cloud
- 🔗 Get Started with FastAPI 🚀
- 🔗 Download Github Desktop For Windows