In this post, we’ll walk through — step by step — how to connect two Ubuntu servers using a private network.
This setup isn’t just about making your servers talk to each other — it’s about doing it faster, cheaper, and more securely. When servers in the same region use private networking, their data never leaves the data center. That means:
⚡ Faster communication: Private links stay inside Linode’s internal backbone, avoiding the latency of public internet hops.
💸 Zero egress fees: Traffic sent over the private network doesn’t count toward your public bandwidth quota — saving real money on data transfer costs.
🔒 More security: Internal traffic never touches the public internet, keeping database replication, API calls, or background jobs isolated and safe.
🧩 Simpler architecture: It’s ideal for setups like a web app talking to a private database, distributed processing between two nodes, or a Docker Swarm cluster.
By the end, you’ll have two Ubuntu servers that can:
✅ Reach the internet normally via their public IPs, and
✅ Seamlessly talk to each other through private IPs — without paying a cent in transfer fees.

Setting up the 2 Servers
For a full guide on configuring a new Linux server , see our in-depth guide here, also be sure to checkout our security checklist
Ensure that the two instances you want to connect are both located in the same region. In this guide, we’ll be using Singapore, but the same process applies to any region.
Also, make sure both instances are running the same Linux distribution. For this post, we’re using Ubuntu 24.04 LTS.


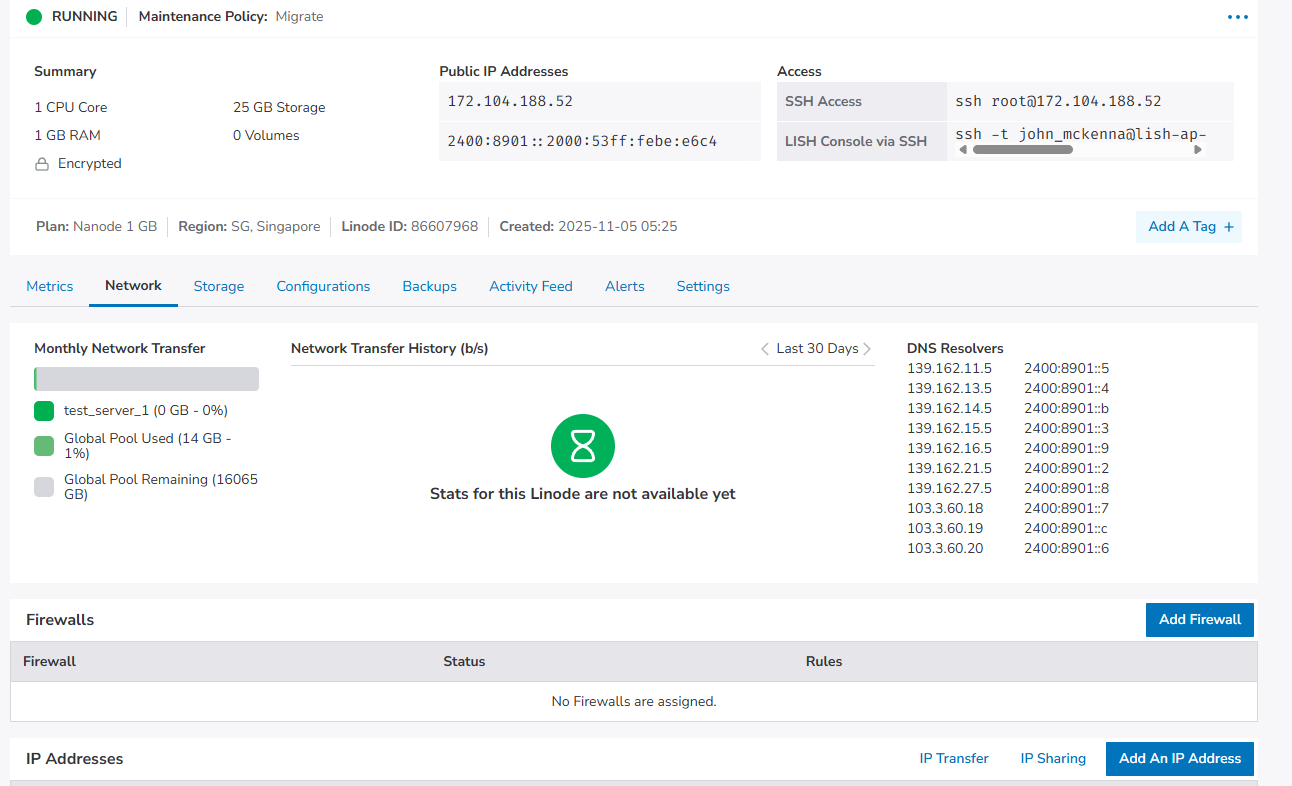
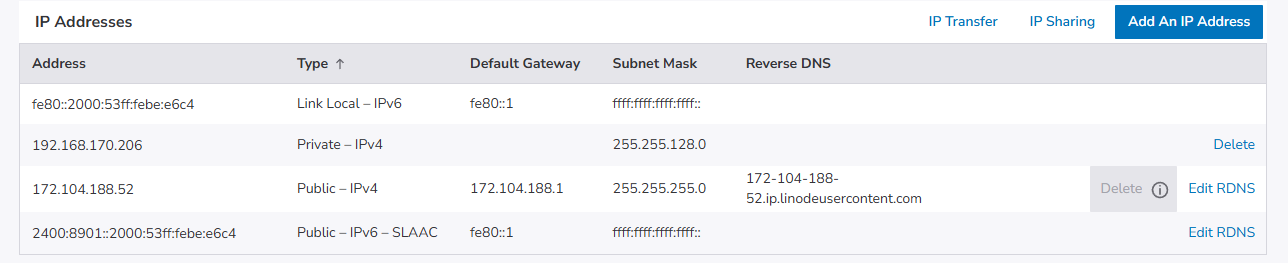
Server 1 IPs
Server 2 IPs
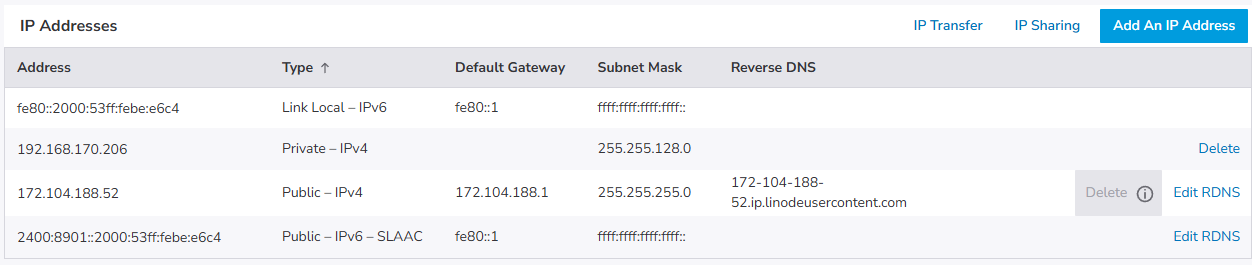
So now we have a total of 2 IP addresses per machine, 1 public and 1 private for a total of 4 IP addresses.
| Server | Public IP | Private IP |
|---|---|---|
| Server 1 | 172.104.188.52 | 192.168.170.206 |
| Server 2 | 139.162.44.9 | 192.168.158.82 |
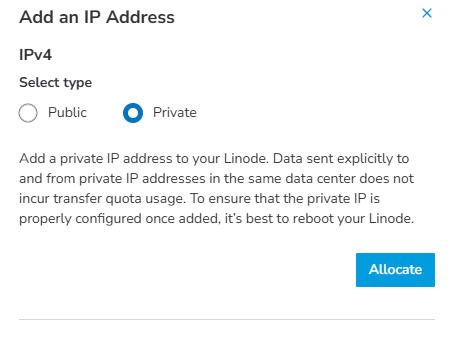
Private IPs come from the Linode dashboard — but they’re not automatically configured in Ubuntu so we will need to add them to each of the servers.
sudo ip addr add <private-ip>/17 dev eth0

If the IP addresses have already been assigned you should see something like
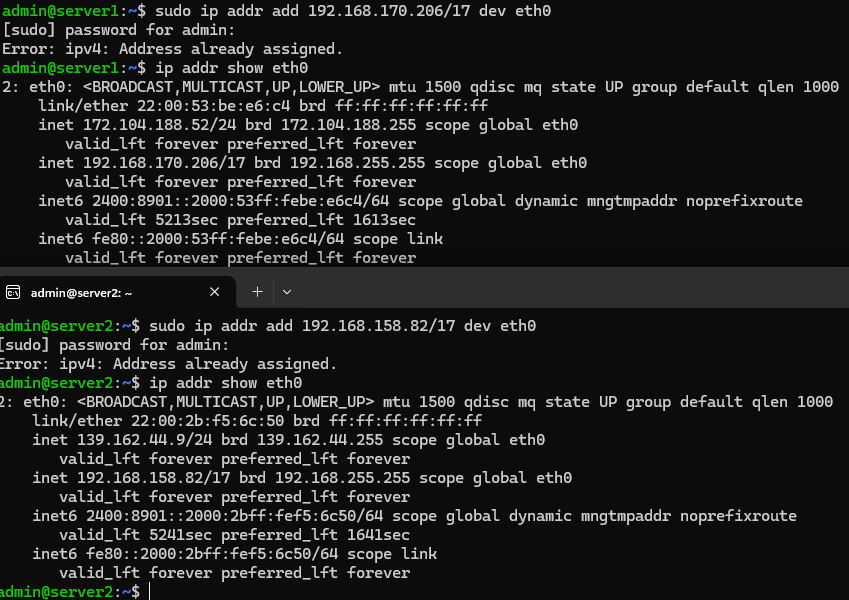
This however is not persistent and we must use Netplan to make it permanent
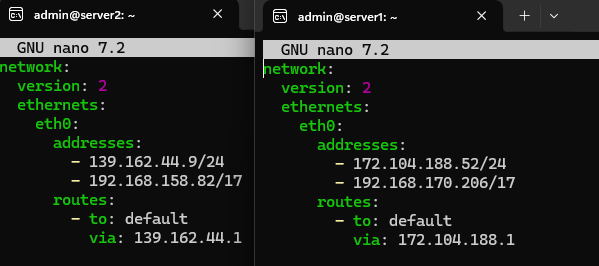
Open the config file with
sudo nano /etc/netplan/50-cloud-init.yaml
And paste the contents below.
network:
  version: 2
  ethernets:
    eth0:
      addresses:
        - <public-ip>/24
        - <private-ip>/17
      routes:
        - to: default
          via: <gateway>
Then you make the changes persistent by typing the command below on both servers
sudo netplan apply
You are likely to see complaints in the terminal like the ouput below , this is just netplan complaining that only root should have access to these config files.
** (generate:14943): WARNING **: 06:26:04.244: Permissions for /etc/netplan/01-netcfg.yaml are too open. Netplan configuration should NOT be accessible by others.

** (generate:14943): WARNING **: 06:26:04.244: Permissions for /etc/netplan/50-cloud-init.yaml are too open. Netplan configuration should NOT be accessible by others.

** (process:14941): WARNING **: 06:26:04.620: Permissions for /etc/netplan/01-netcfg.yaml are too open. Netplan configuration should NOT be accessible by others.

** (process:14941): WARNING **: 06:26:04.620: Permissions for /etc/netplan/50-cloud-init.yaml are too open. Netplan configuration should NOT be accessible by others.

** (process:14941): WARNING **: 06:26:04.793: Permissions for /etc/netplan/01-netcfg.yaml are too open. Netplan configuration should NOT be accessible by others.

** (process:14941): WARNING **: 06:26:04.794: Permissions for /etc/netplan/50-cloud-init.yaml are too open. Netplan conf
You can fix this warning with the following command on both servers
sudo chmod 600 /etc/netplan/*.yaml && sudo netplan apply
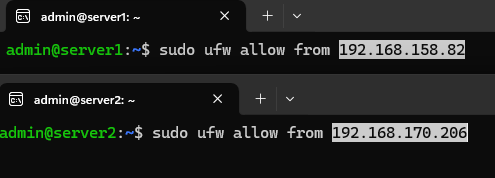
Enable Private IP Through the Firewall
Since you should have a firewall enabled, it will be default block incoming traffic , therefore we need to make a rule on each server to allow traffic from the other server.
sudo ufw allow from <private ip of server you want to allow connection from>
So for me on server 1 I input the private IP of server 2 and vice versa on server 2
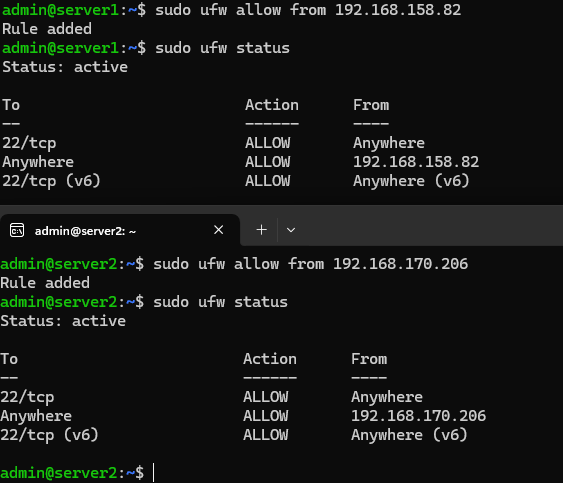
Then we want to ensure that the rule has worked by typing
sudo ufw status
And we should see the rule on each of the servers.
Ping Connected Server to Ensure Connectivity
In order to check whether the servers have been connected successfully we can send a ping from one server to the other's private IP address
ping -c 3 <server private ip address>

Trouble-shooting IP address not Persisting
For some reason, on one of my servers, every time the Netplan configuration was applied, the private IP address would be dropped.
To fix this issue, the following steps were used.
Note that the <private ip> placeholder below refers to the private IP of the specific server.
echo 'ip addr add <private ip>/17 dev eth0' | sudo tee /etc/network/if-up.d/add-private-ip
sudo chmod +x /etc/network/if-up.d/add-private-ip
This adds a script that starts on boot to add the private IP address to eth0
Setting Internal Hostnames
Since it will be very cumbersome to constantly have to remember and type out the private IP address of the servers we want to connect to, it is a better idea to create a hostname.
To do this on each server type in
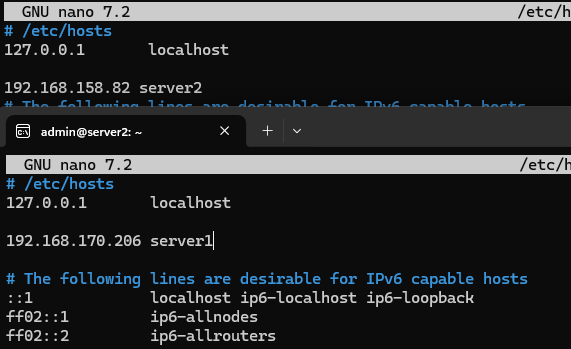
sudo nano /etc/hosts
And then put the other server's IP address and a useful name in your editor
Then we are able to ping the server from the given hostname with ping -c 3 <hostname>

And that's it hopefully you were able to follow along with this guide!